
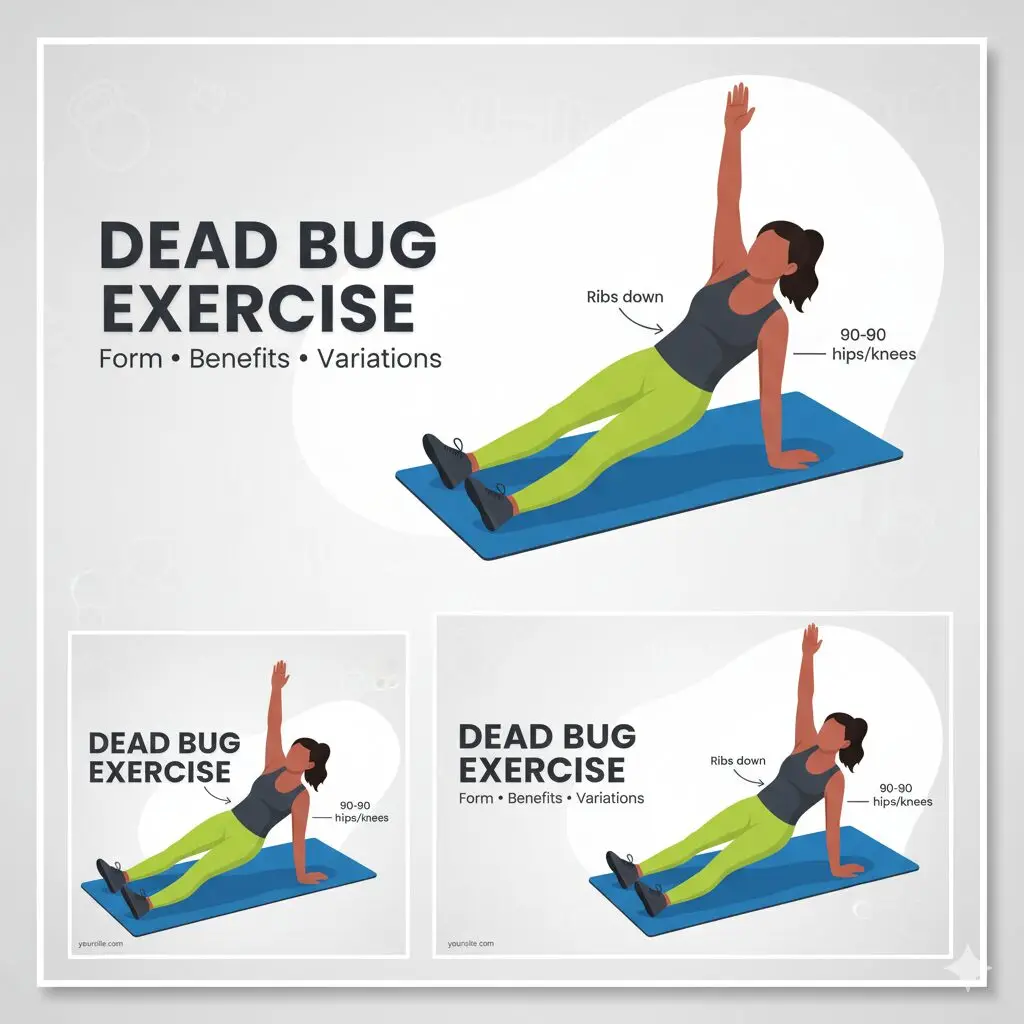
Dead Bug Exercise: A Simple Guide to Strong, Stable Abs
“Learn how to do the dead bug exercise with step‑by‑step instructions, muscles worked, key benefits, mistakes to avoid, easy variations, and a simple 4‑week plan.”
If crunches bother your back or you want a smarter way to train your core, the dead bug exercise is a great place to start. It teaches you how to keep your spine steady while your arms and legs move, which is how your body needs to work in daily life, sports, and lifting.
Table of contents
-
- What is the dead bug core exercise?
- Muscles worked
- How to do the dead bug exercise (step by step)
- Dead Bug Exercise Benefits
- Common mistakes and simple fixes
- Variations and progressions
- Programming and a 4‑week plan
- Safety and who should be cautious
- FAQs
- Related posts
- Conclusion
What is the dead bug core exercise?
The dead bug core exercise is a floor‑based movement where you lie on your back, bring your hips and knees to a 90–90 “tabletop” position, and raise your arms toward the ceiling. From there, you slowly extend the opposite arm and leg while keeping your lower back neutral. Then you return to the start and switch sides. Because the goal is to keep the spine from arching while the limbs move, it’s called an “anti‑extension” exercise.
People also search “what is a dead bug exercise?” and you can think of it as the opposite of a crunch: instead of bending the spine, you hold it steady.
A quick note on names: some people call it the “dead bugs exercise.” The technique is the same.

Muscles worked
This move trains your core to stabilise the spine while your arms and legs move. Here’s what works the hardest:
- Transverse abdominis (deep core) and internal/external obliques
- Rectus abdominis (front abs)
- Hip flexors and glutes (for pelvic control)
- Spinal erectors (isometric stability)
- Serratus anterior and shoulder stabilisers (for arm reach)
During the dead bug exercise, these muscles coordinate so your ribs and pelvis stay aligned while the limbs travel. That makes it a very functional drill for walking, running, lifting, and even sitting with better posture.
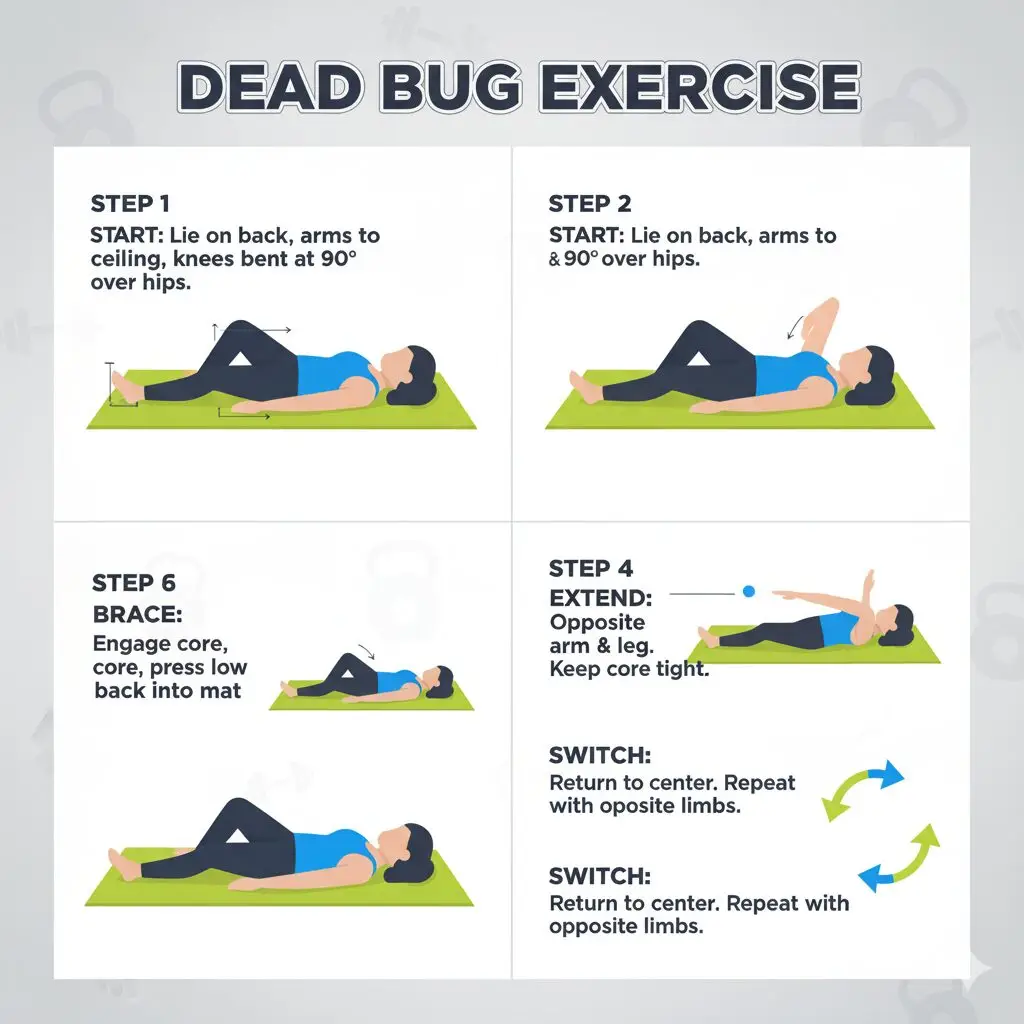
How to do the dead bug exercise (step by step)
Setup
- Lie on your back on a mat. Keep your head relaxed and gaze up.
- Bring hips and knees to 90–90. Shins parallel to the floor.
- Raise both arms straight above your shoulders, palms facing each other.
- Gently pull your ribs down and keep a natural curve in your lower back. Do not smash your back into the floor; stay neutral.
Movement
5) Exhale softly and brace your core like you are preparing for a gentle poke.
6) Extend your right leg toward the floor while reaching your left arm behind your head. Move slowly and under control.
7) Stop before your lower back starts to arch. Range of motion should never break your form.
8) Return to the start and switch sides.
Reps, sets, tempo
- Beginners: 2–3 sets of 6–8 reps per side
- Intermediate: 3 sets of 8–10 reps per side
- Tempo: 2–3 seconds out, 2 seconds back; breathe on every rep
- Rest: 30–60 seconds between sets
Coaching cues
- Ribs down, pelvis neutral. Think “zip up” the abs.
- Move slow; no swinging arms or legs.
- Exhale on the reach; light inhale as you return.
- If your back arches, shorten the reach or regress to an easier version.
Dead Bug Exercise Benefits
“Dead bug exercise benefits” include a mix of strength, control, and comfort for your back:
- Back‑friendly core training: Builds stability without bending or twisting the spine.
- Better posture and alignment: Helps ribs and pelvis stack, reducing excessive lower‑back arch.
- Real‑life carryover: Contralateral (opposite‑side) arm/leg control improves walking, running, and lifting mechanics.
- Coordination and balance: Trains the timing between the upper and lower body.
- Easy to scale: There are beginner and advanced versions so that anyone can start.
- Great for warm‑ups: Wakes up deep core muscles before heavier training.
Common mistakes and simple fixes
- Arching the lower back
- Fix: Breathe out as you reach, keep your ribs down, and reduce your range.
- Rushing the reps
- Fix: Use a slow, even tempo. Quality beats quantity.
- Neck strain
- Fix: Keep your head down and your chin slightly tucked.
- Knees drifting out of 90–90
- Fix: Reset your tabletop position before each rep.
- Holding your breath
- Fix: Gentle brace while still breathing. Think “breathe behind the shield.”
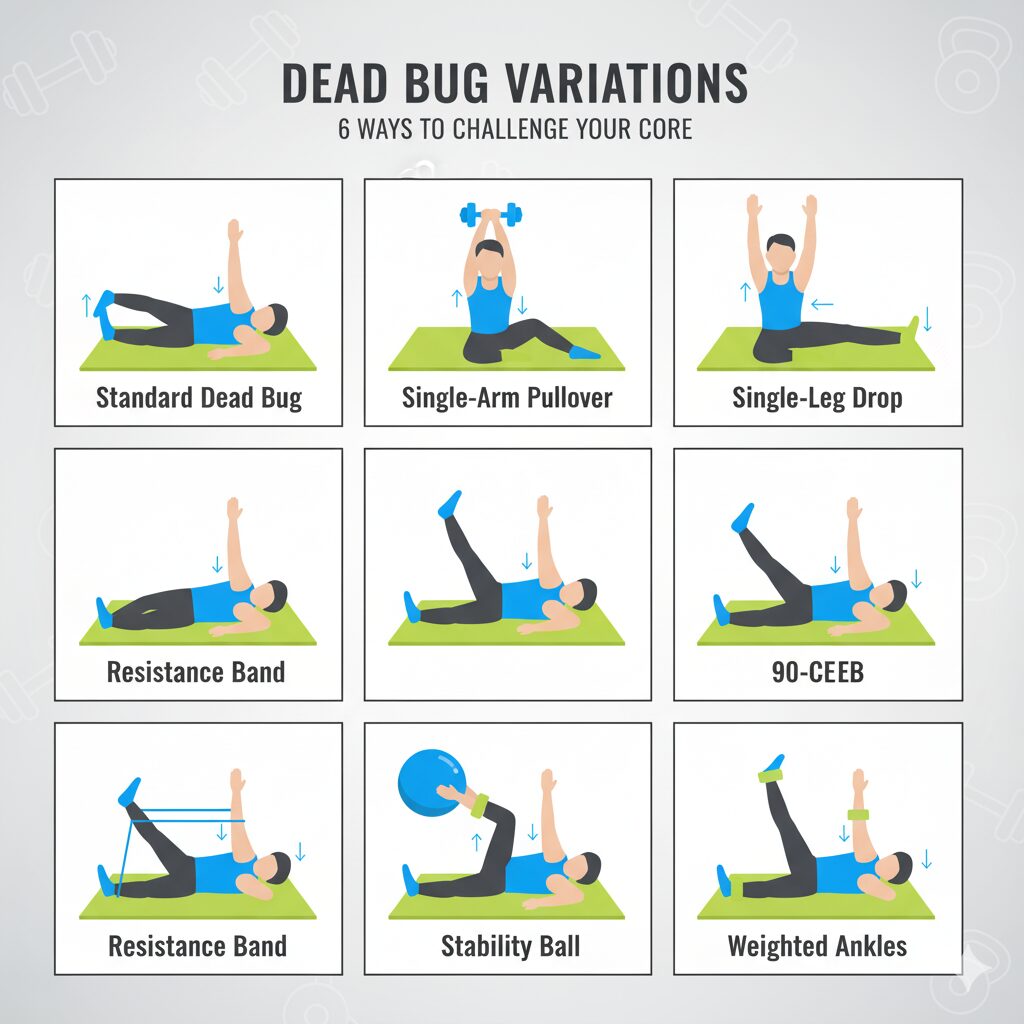
Variations and progressions
There are many dead bug exercises you can use to match your level. Start with the dead bug exercise and move up only when your form is rock solid.
Beginner
- Heel taps: Keep feet on the floor and tap one heel at a time.
- Arm‑only reaches: Arms move, legs stay at 90–90.
- Leg‑only reaches: Legs move, arms stay up.
- Short‑range alternating: Do the full pattern, but only move halfway until control improves.
Intermediate
- Standard alternating: The classic pattern with opposite arm and leg.
- Stability‑ball squeeze: Press a small ball between your hand and knee on the non‑moving side; extend the other arm/leg.
- Band‑resisted: Hold a light resistance band overhead while your legs move.
- Tempo or pause reps: 3 seconds out, 1–2 seconds hold, 3 seconds back.
Advanced
- Straight‑leg version: Fully extend the moving leg to increase difficulty.
- Loaded reaches: Hold light dumbbells or plates overhead.
- Iso‑holds: Pause 3–5 seconds at the end of each reach.
- Hollow‑body hybrid: Slightly lower both legs while keeping the back neutral (only if you have excellent control).
Programming and a 4‑week plan
You can add the dead bug exercise to warm‑ups, core sessions, or active recovery days. It pairs well with bird dogs, side planks, and glute bridges for a balanced, spine‑friendly core routine.
Where it fits
- Warm‑up: 1–2 sets before strength training or running
- Core block: 2–3 sets with other stability drills
- Active recovery: Easy sets to reinforce technique without fatigue
4‑week simple plan
- Week 1: Practice 3 days. 2 sets of 6–8 per side, slow tempo.
- Week 2: 3 sets of 8 per side. Add a 1‑second pause at full reach.
- Week 3: Keep 2 sets standard. Add 1 set of stability‑ball squeeze or band‑resisted.
- Week 4: 3 sets of 8–10 per side. If form is perfect, try straight‑leg reps for the last few reps.
Progress rules
- Move up only when you can keep a neutral back and smooth breathing on every rep.
- If form slips, regress to the previous step and master it.
Safety and who should be cautious
Add the dead bug exercise carefully if you have recent back pain, disc symptoms, surgery, or if you are pregnant/postpartum—get professional guidance first. Stop if you feel sharp or joint pain. Muscle effort or a mild “core burn” is fine; pain is not. If you struggle to keep your lower back neutral, shorten the range, slow down, or switch to heel taps until control improves.
FAQs
What makes this move different from crunches?
It trains spine stability instead of bending the spine. That’s why many people find it more comfortable on the lower back.
How often should I practice it?
Two to four times per week works well for most. Use it in warm‑ups or as part of a short core circuit.
How many reps should I do?
Aim for 6–10 per side with slow control. Stop one rep before form breaks.
What equipment do I need?
A mat is enough. A small ball, light resistance band, or light dumbbells are optional for progressions.
Why does my lower back arch during the movement?
You may be reaching too far or moving too fast. Exhale as you reach, keep your ribs down, and reduce your range.
Can beginners start right away?
Yes. Begin with heel taps or arm‑only or leg‑only reaches, then progress when you can maintain control.
Is this good for ruewnners and lifters?
Yes. The contralateral pattern improves coordination for running, and the stability work supports lifts like squats and deadlifts.
Related posts
- Bird Dog: How to Do It and Why It Helps Your Spine
- Side Plank Variations for Strong Obliques
- Best Lateral Head Tricep Exercises (Outer/Side Tricep Workouts)
- Hollow Body Hold vs Dead Bug: Which to Choose?
- 10‑Minute Core Warm‑Up Before Lifting
Final Thought
The dead bug exercise deserves a place in almost every routine. It builds real‑world stability, teaches better posture, and strengthens your core without stressing your back. Start with a simple version, move slowly, and progress only when your control is solid. With a few minutes of focused work, you’ll feel stronger and more stable in daily life and during your workouts.